
For two weeks, I have been teaching area and perimeter. My students are in Primary 3 and this is the first time they are taught the concepts of area and perimeter. They have learnt the related topic of length in Primary 2. In this blog post, I summarise the lesson objectives, consolidate lesson ideas shared by various teachers and highlight some common errors made by students.
LESSON OBJECTIVES
Basically, students need to know:
1) Area
-Area is the amount of surface occupied.
-To find area, count the number of unit squares or use length x breadth for squares or rectangles.
-The unit of area is cm2 or m2 .
2) Perimeter
-Perimeter is the total length around a figure.
-To find perimeter, add all the sides.
-The unit of perimeter is cm or m.
LESSON IDEAS
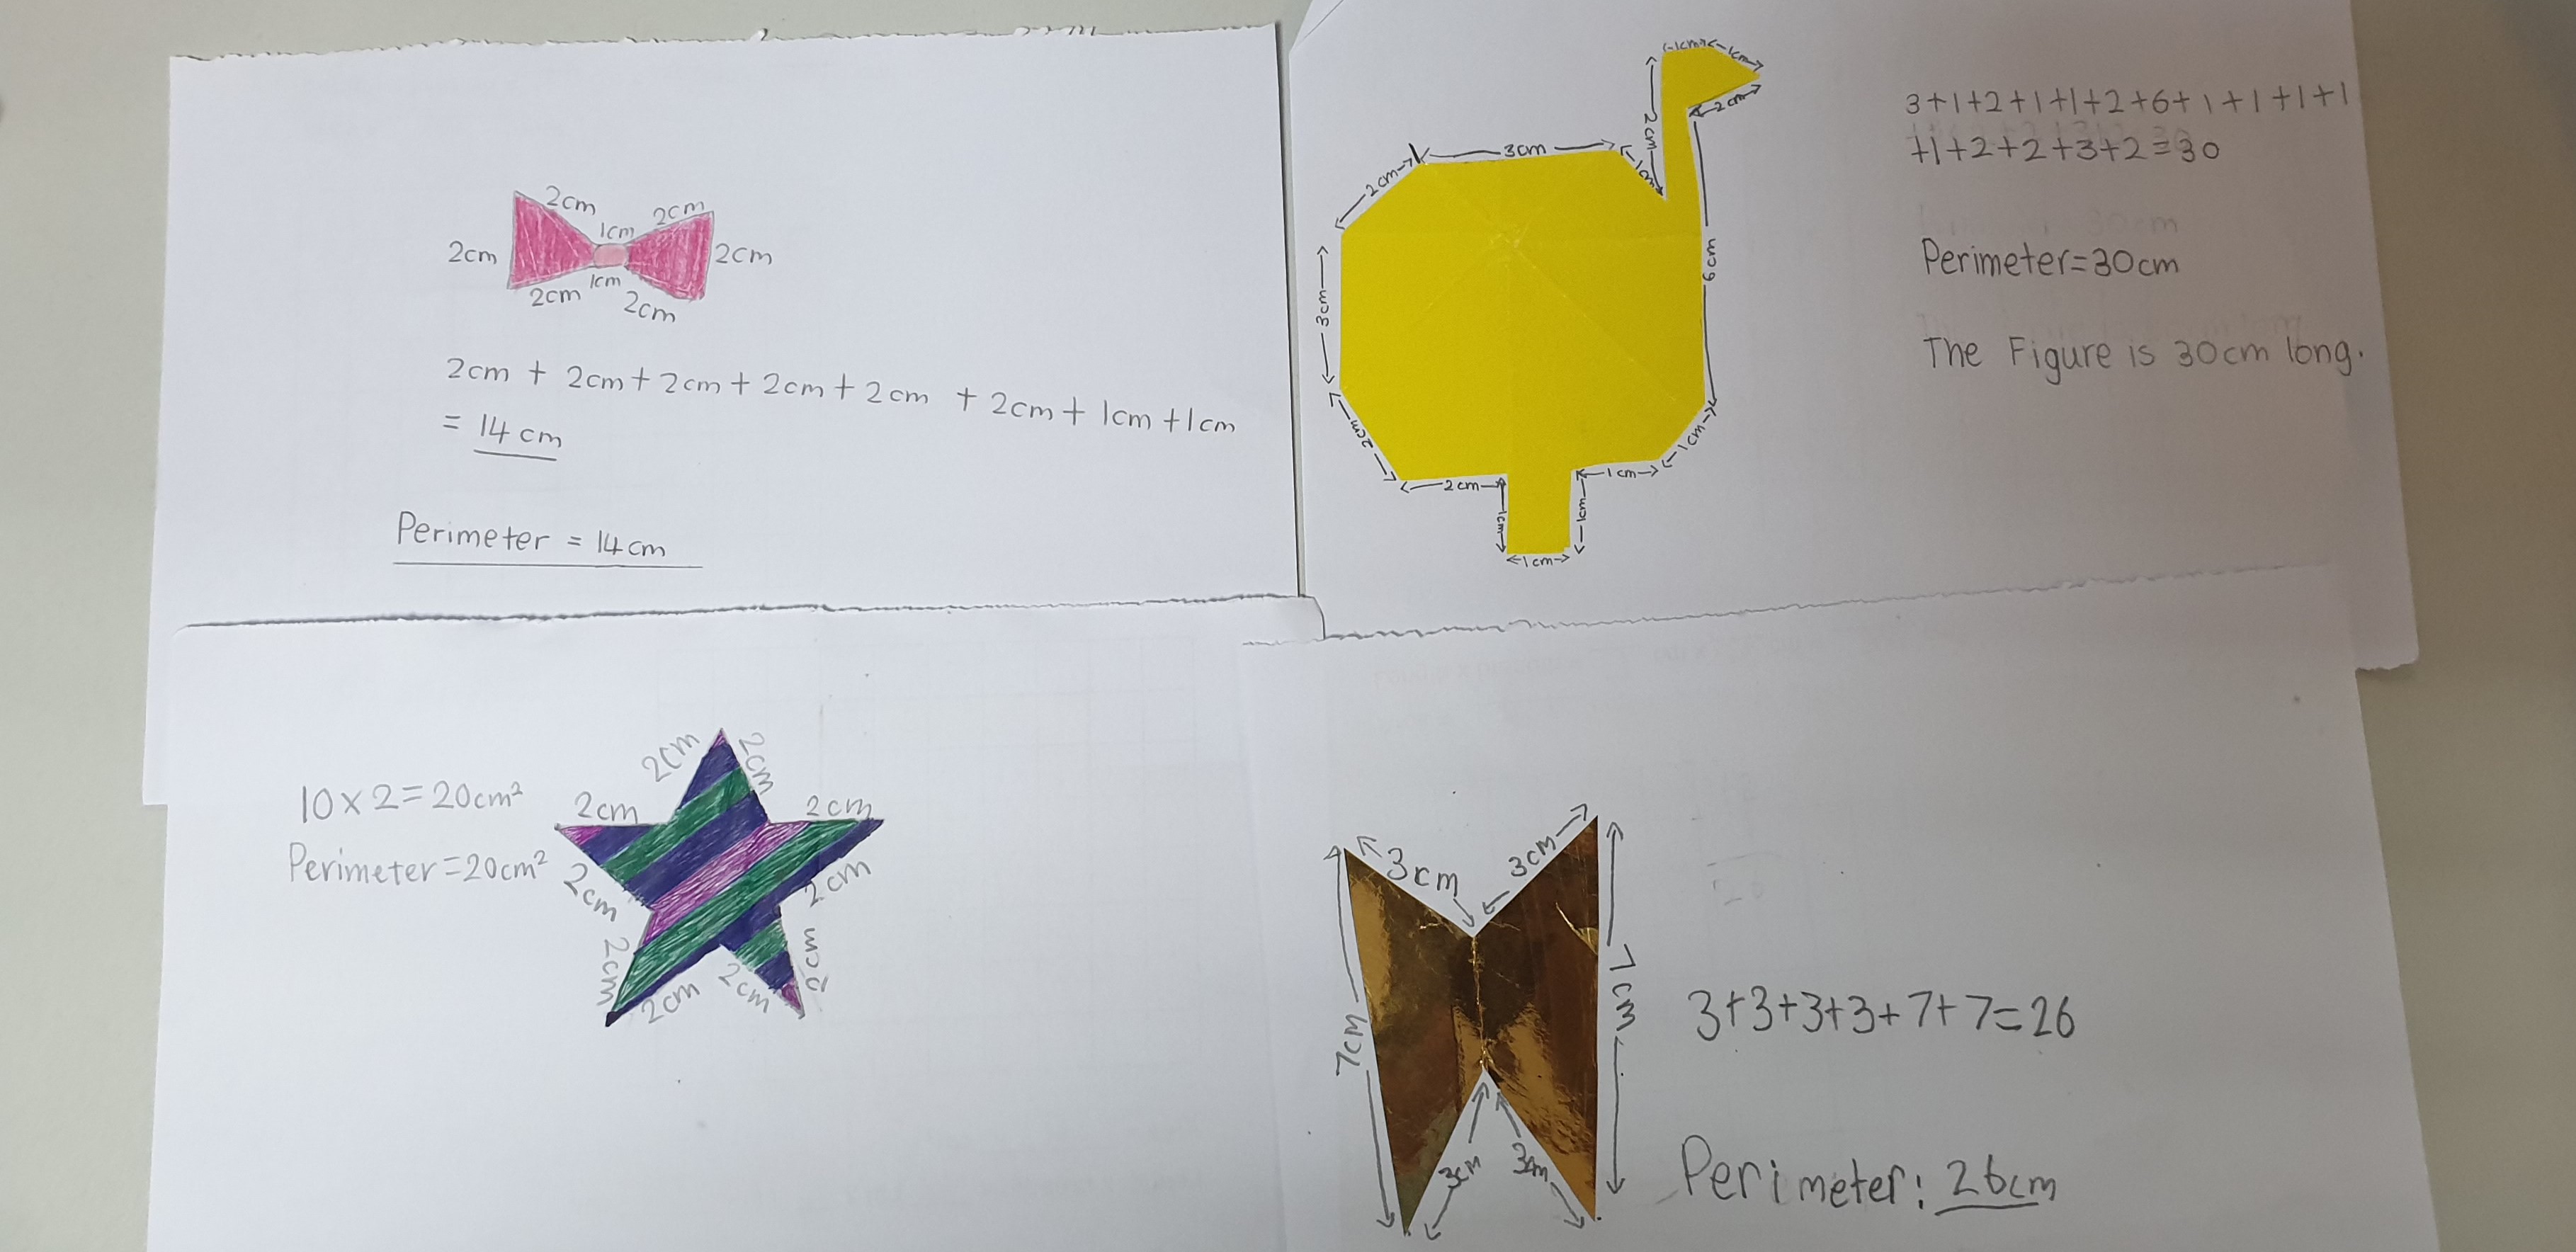
1) Students draw pictures or use origami paper to form figures. Each student measures the lengths of all the sides of his / her figure and adds them up to find the perimeter of the figure. Some interesting pieces of work from my students are shown below:
2) To help students remember the difference between area and perimeter, origami paper can be used. For area, students are told they had to find out the amount of surface occupied by the piece of paper and to do that, they can multiply the length and breadth. Multiplying the length and breadth will give the total number of unit squares occupied by the piece of paper.
For perimeter, the outline of the figure is traced to show that the perimeter is the total length around the figure. Students add the lengths of all the sides to find the perimeter. The picture below shows the posters placed at the front of my classroom to remind students about the difference between area and perimeter.


3) Coloured tiles can also be used to teach area and perimeter. The tiles can be arranged to form a figure. Students can count the total number of tiles used to find the area of the figure. If the figure is a square or a rectangle, students can multiply the length and breadth of the figure to find the total number of tiles used, which is also its area.
The outline of the figure can be traced, after which the tiles can be removed. Students add the lengths of all the sides to find the perimeter of the figure.


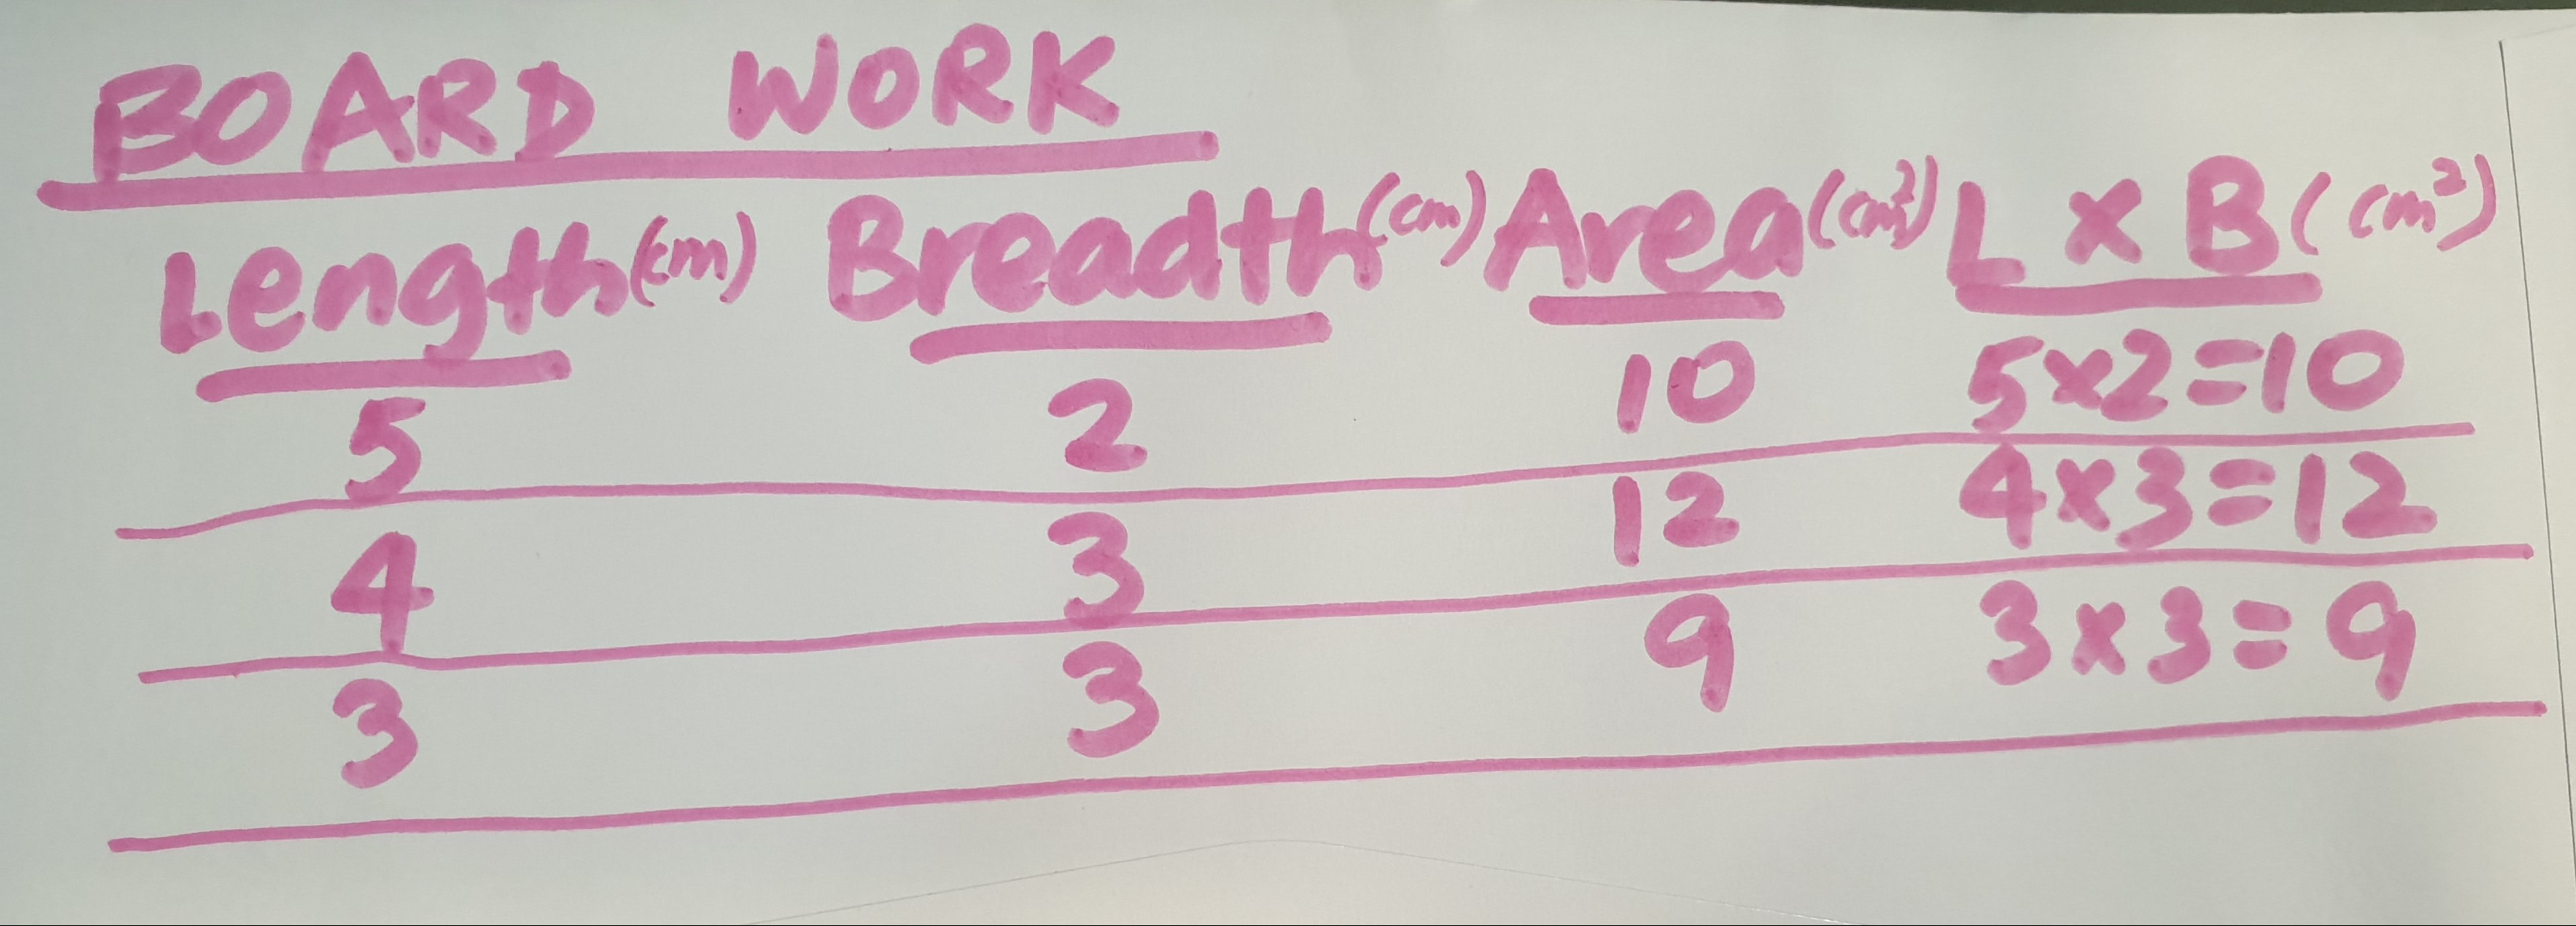
4) Each student draws a different square or rectangle on a grid paper provided. In a table, the teacher records the length, breadth and area (by counting the number of unit squares) of each square or rectangle. Students deduce that area = length x breadth and checks that the formula applies to every example on the board.


5) Students who are inclined towards art may find it interesting to draw their own creative figures on grid paper. They can find out the perimeter and area of the figures they have drawn. Below are some very attractive pictures drawn by my students:


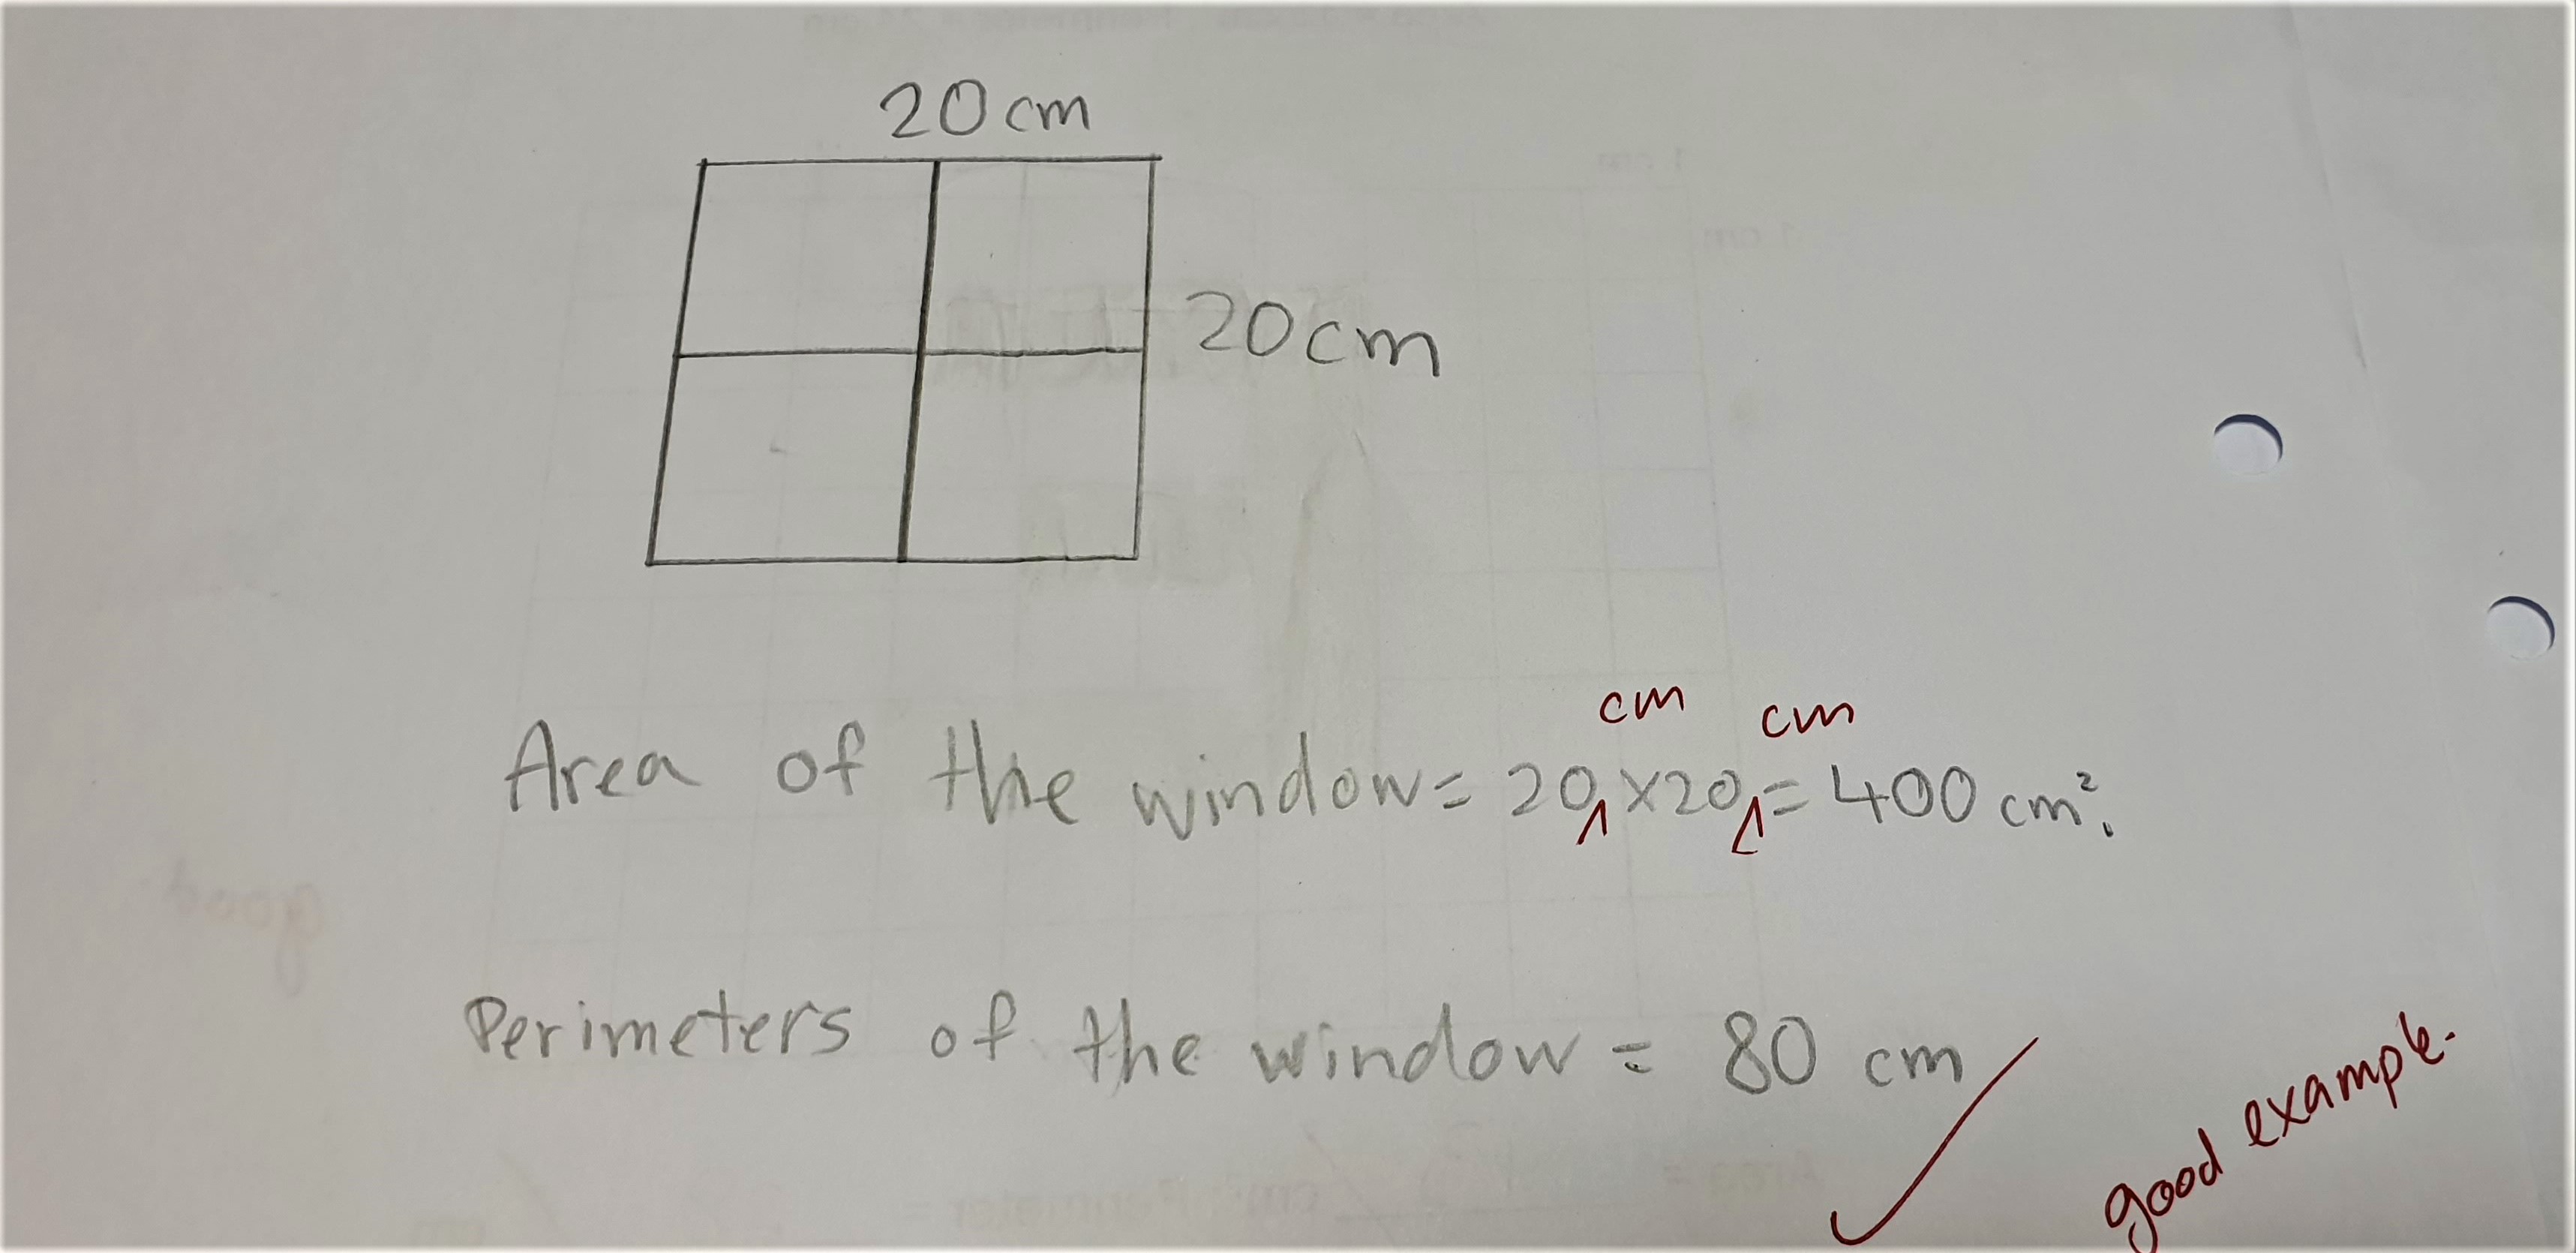
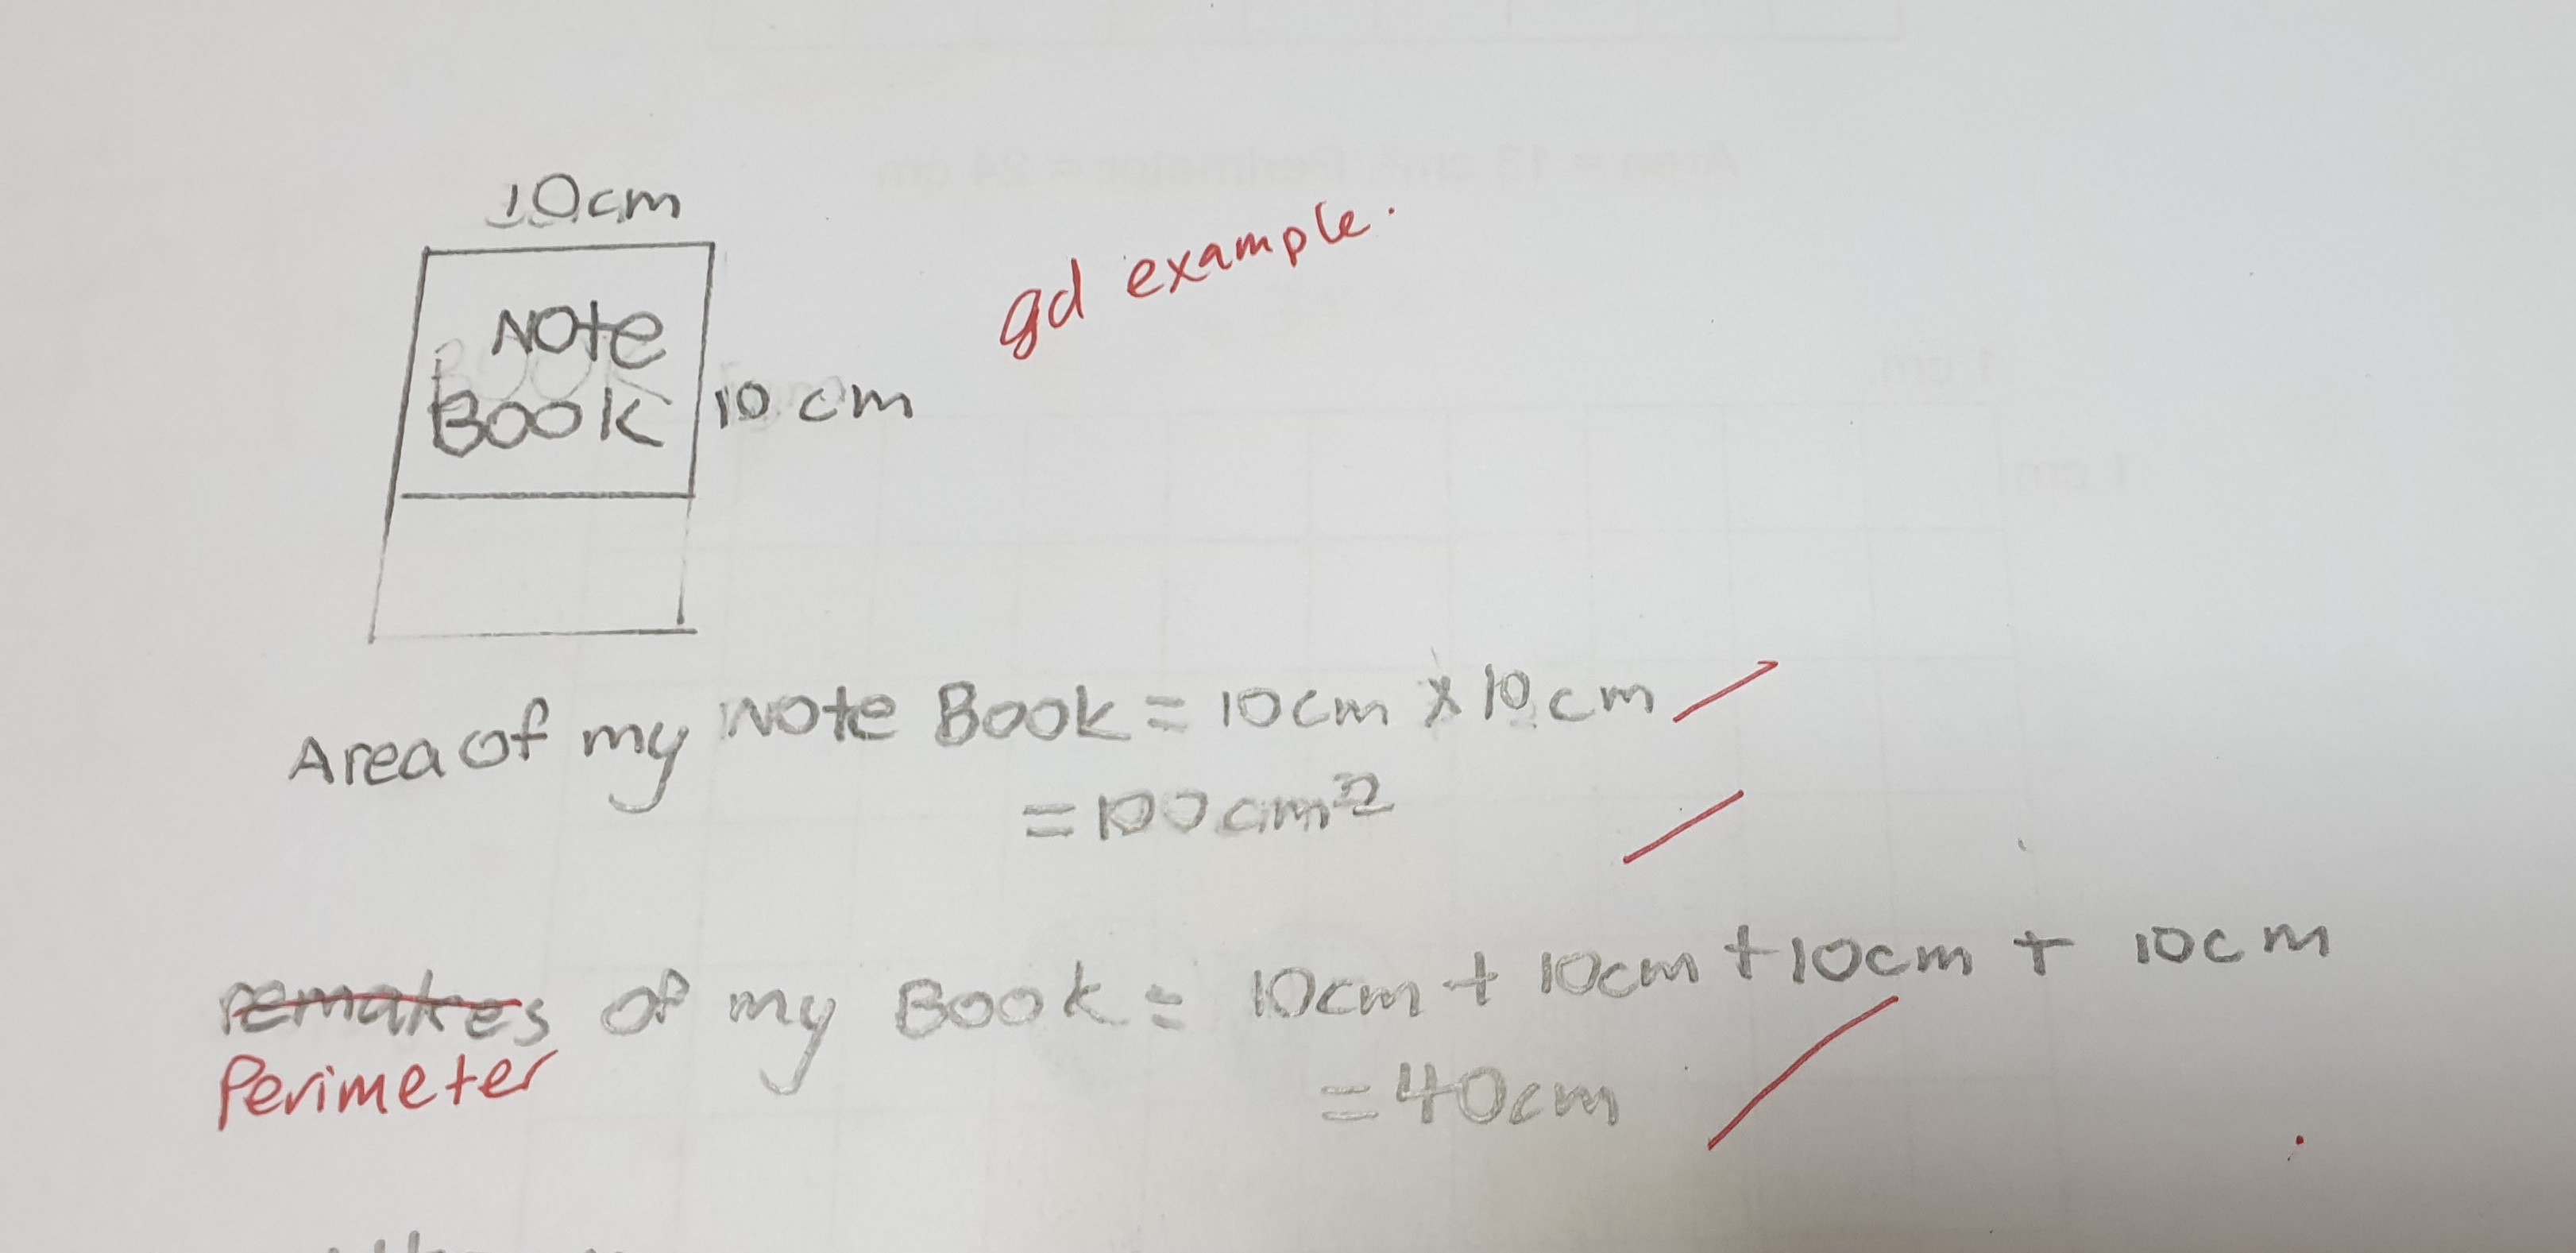
6) Students can also relate area and perimeter to real life. For example, they can find out the area and perimeter of their mathematics textbook, an exercise book, their desk, the surface of a Rubik’s cube and so on. Here are some ideas from the students:

7) One teacher also suggests using the geoboard to teach perimeter.
COMMON ERRORS
1) Students tend to mix up area and perimeter.
How to rectify:
I told my students to remember the acronym ASO (old lady) and PLAF (Olaf’s name mis-spelled). ASO stands for Area = Amount of Surface Occupied. PLAF stands for Perimeter = Length Around a Figure.
Perhaps a song can help them remember the difference too. I have not tried this yet, but the following can be sung to Twinkle, Twinkle Little Stars:
Area equals length x breadth,
Or you can count the squares.
Perimeter, length around a figure,
You can add up all the sides
Don’t forget the units for area
You have to add the 2.
2) Students write the wrong units.
How to rectify:
I told my students that since perimeter is equal to the total length around a figure, the unit used for perimeter is the same as that for length and breadth (cm or m). They need to add the superscript 2 (my students say the tiny 2) for area because the surface of a figure is 2-d. Students should read cm2 as square centimetres and m2 as square metres .
The song above (sung to Twinkle, Twinkle) may remind students to add the tiny 2 for area.
